Sunday, December 8, 2013

CTMH Australasian Blog Hop - December Stamp of the Month

Hello and welcome aboard the Australasian Close to My Heart Stamp of the Month Blog Hop. If you have arrived here from Jenny's Blog, then you are in the right place. The blog hop is a loop, so by following the links at the bottom of the posts you will be able to work your way through all of our fun ideas.

 Today I would like to share with you this layout which features the December stamp of the month, Special Care, a set of 6.


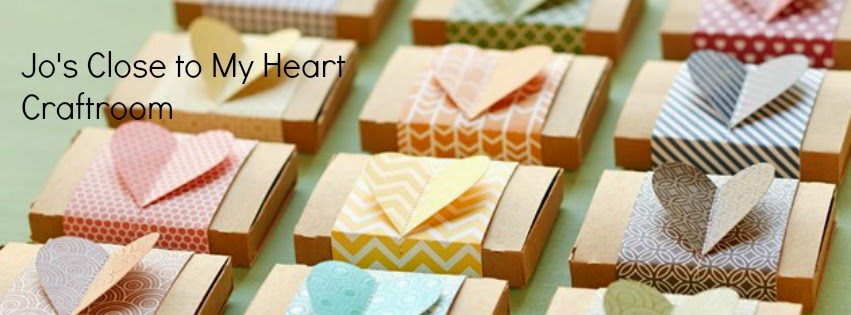
Plus I have also been hard at work creating some Christmas end of the year gifts for the teachers and coaches who work with my children. These little boxes are Cricut cut and have a little soap inside. The "wash away your cares" message is therefore particularly appropriate!

This exclusive stamp of the month is only available during December. It can be yours for just $5 with a qualifying order of $75 or for $29 if ordered separately from your CTMH consultant. If you do not have a consultant please contact me or place an order in my online store. I'd love you to leave a comment before heading off to Monika's Blog,  A Sprinkle of Glitter.

Monday, November 18, 2013

Playing with the Stamp of the Month

I just adore the "Illuminate" stamp set - the stamp of the month for November. I had a lovely play with it last week and here are some of the things I produced:


The Stamp of the Month is only available for a limited time, so if you love it, buy it NOW! You can pay $29, or only $5 when you make a purchase of $75 or more.

Thursday, November 7, 2013

A full album in 3 days

A full 15-page album in three days? Not possible, I hear you cry! But it is, and it wasn't because I did nothing else for three days. Read on and you will learn how it can be done.

Besides being a quick album, it was also very affordable. The whole album cost less than $60 to put together. And again, it wasn't because I was scrimping. I didn't buy my supplies from the bulk bin at the Warehouse when they were all tatty and on sale. I used quality Close to My heart products and I love the result.

Okay, here's the back story: My uncle turned 80 this month and to celebrate the occasion, most of the family got together - cousins, cousins' children, aunts and uncles. You get the picture. One of those events which are few and far between because the families are so far flung these days. You really only do it for funerals, and who's got the camera out then? But this was different: a lot of fun; a weekend full of joyous moments. So I snapped constantly, and I ended up with just over 100 photos that were usable.


I printed them off and waited for the album to arrive (this was the longest part). This is what I bought:
Outdoor Denim 12x12" Faux Leather Album - $23*
It comes with 5 sleeves, and I only needed to add one more - $1
I added 1 x portrait sleeve - $1.45
I added 8 x landscape sleeves - $11.60
Tommy paper packet (6x cardstock and 6x papers) - $17
I added 4 extra sheets of Colonnial White cardstock - $3


The total cost for the finished 15 page album was $57.05. Brilliant!
I didn't buy embellishments - I made these using stamps. I only used one paper packet, choosing instead to create a texture if I wanted one. I have now four sets of background stamps - distressing, geometric, etc. It gives me a wide variety of backgrounds to create in my chosen colours.
Additional supplies which I already had include my three ink pads, my Outdoor Denim Chevron Ribbon, snips, my stamp sets, my blocks, and hemp.

The key to the speed was choosing which photos to turn into scrapbook pages, and which to simply add to the album in the multi-pockets. I made three group photos into enlargements and made nice pages of these, plus I chose a few more key photos that I thought were beautiful or deserved journaling. In the end I only made 10 actual scrapbook pages, the other photos were added in to multi pocket sleeves - either portrait or landscape.

The other thing that helped with the time factor was having a layout in mind. This ALWAYS helps me. Here I turned to my big stash of layout sketches, plus the "Make it from the Heart" books. They are easily adapted and come with such clear cutting patterns.


Creating co-ordination across the album was easy: I simply kept to the Tommy colour range. My three colours of ink were Outdoor Denim, Desert Sand and Ruby, matching the cardstocks in the paper packet (Cranberry would have been better, but I had Ruby and it worked fine.)
* I got my album half price... this is a wonderful saving! All you have to do is be a hostess for a party. Get a few orders together and have an "online" party, or an "actual" party where we make a project.

Tuesday, October 29, 2013

Lots of Layers

"Lots of Layers" is one of the themes this month on the Heart 2 Heart Challenge blogsite. I have enjoyed working on these layered cards for a while - it's fun to play with the different colours and adorn them in different ways For this card I used a BoBunny stamp set which features snowflake designs, plus White Daisy and Juniper cardstocks, along with Juniper, Ruby and Slate inks. The sentiment stamps are from the Scandinavian Wishes Stamp of the Month set.
I am really enjoying using this colour range for my Christmas projects this year - it's a bit different to the usual deep green and red, and I like it.

A new challenge site!

I discovered a new challenge site and have made a card with the current sketch. Thank you Sunny Challenges!
Here is my card. Ingredients are White Daisy, Juniper and Ruby cardstocks, paper from the Sparkle and Shine pack, and ruby chevron ribbon. The stamp is from this month's Stamp of the Month set - Scandinavian Wishes - a special deal for only $5.
This card is also for the Heart 2 Heart challenge which is to "Shape it Up!".

Wise men still seek Him

This card was made with the sketch over at Atlantic Hearts this week. I used Slate, Juniper and White daisy cardstocks, slate ink, and the stamps from my favourite set - Glory to God. The decorative paper is from the Sparkle and Shine paper packet.

Sunday, October 20, 2013

Deck the Halls

Christmas is such a wonderful theme to design for. Cards, gift bags, gift boxes, home décor... I love it.
This card features Ruby and Topiary cardstocks and inks. The ribbon is Ruby Chevron and the stamps are from the Yuletide Greetings (sentiment), Cricut Seasons (flower) and Universal Backgrounds (notes) sets. I have to say that the Universal Backgrounds set is fast becoming my  most-used. It's very versatile, and I am really enjoying creating my own textures with tone on tone patterns.
This card is for two challenges. The sketch comes from the Atlantic Hearts site, and the theme (Au Naturale) from Heart 2 Heart.

Little Black Dress

I really enjoyed making this birthday card! I cut two dresses from the Artiste cartridge on the Cricut - one in Juniper and one in Black. I also cut a 1.5" rose in Juniper. I used my Universal Backgrounds to decorate the Juniper dress and the face of the card, which is in Desert Sand. I used the Perfect Fit - Birthday stamp set for the sentiment and the little rows of cakes.
This card is for the "Little Black Dress" theme on the Heart 2 Heart Challenge site this month. Thank-you, ladies, for another very cool theme!

Saturday, October 19, 2013

Abracadabra!


I call this one the "Magic Disappearing Lid" Box... I'm sure it has many more names. I love this box - it's so clever! It has a lid, but as you pull the top part up, the lid disappears and becomes part o the sides of the box... very snazzy.


I created this box with the papers from the Sparkle and Shine paper pack, just recently released in CTMH's Holiday Gift Guide. The stamps are from the Perfect Fit Frames set, Universal Backgrounds set and the Magical Days Set (also in the Gift Guide).
I cut many elements of this project on the Cricut, with the Artiste cartridge. The box itself, the Frame, the circle, and the "Peace" banner.
The cardstock colours are Juniper, Slate and Colonial White.
I hope that you like my wee project! If you want to make a similar one, contact me about coming to a Workshop - I like to have my Cricut on hand for neat little boxes such as these, which are far too tricky and fiddly to cut by hand.
This gift box is my second for the Holiday Gift Guide Blog Hop, click here to see my original post and also the links to the other ladies' creations.

CTMH Holidays with Heart Australasian Blog Hop

Hello and welcome to the first Australasian Close to My Heart Blog Hop! If you have arrived here from Natalie's Blog,  then you are in the right place. If you landed here by accident, no problem, please join in by following the link at the end of this post. 
Today I would like to share with you this cool idea for an Advent Calendar which features the use of the "Magical Days" stamp set from the Holidays from the Heart Gift Guide, live now through December 31st. I love this sweet and different way of counting down the days till Christmas... the wee bags can be filled with treats or messages for each day of Advent.


I have used Close to My Heart's pigment ink pads to stamp first a background and then the number on the bags. I used a small piece of paper to mask the area in the centre of the background so that there was a space saved for the number.
Products used: Universal Backgrounds $29 (D1477), Black pigment ink, Topiary pigment ink, Ruby pigment ink, Magical Days stamp set (D1552), Linen drawstring bags ($7 for a set of three). 
 
All the products in the Holidays from the Heart Gift Guide are available now through December 31 from your CTMH consultant whilst stocks last. Some items are in short supply so order early to avoid disappointment. Orders totalling over $150 NZ during the promotion can choose one starred item from the Holidays from the Heart Gift Guide for free.
I'd love you to leave a comment before heading off to the next stop,  Jenny's Blog.
Thank you so much for hopping by!

Tuesday, October 15, 2013

Close to My Heart Holidays from the Heart Blog Hop

Welcome to the Blog Hop for our brand new Holidays from the Heart Gift Guide! This brochure is full of so many beautiful items, and I had difficulty choosing what to play with. I have chosen to focus on the Sparkle and Shine papers for this post, along with shapes found on the CTMH Artiste cartridge for the Cricut.
By hopping from one post to another along this chain, you will be able to see all sorts of amazing projects created by Close to My heart consultants all over the world! This blogger lives in Timaru, New Zealand, but loves linking with consultants internationally.
Please feel free to browse and be inspired by our work... and to contact your Consultant for the products to create these Christmassy items for yourself.
My twisted easel card is cut with a face of 4". The decorative layer is 3.75" and the white daisy layer is 3.25". I have used Juniper and Slate cardstock to co-ordinate with the colours in the Sparkle and Shine paper packet. I have also used Slate, Juniper and Ruby inks for stamping and sponging.

The background stamps are from the Universal Backgrounds set of four - this has some lovely textures, and I felt that the music and elegant script were very appropriate for this project.
The sentiment, "Peace on Earth" comes from the Glory to God stamp set, which is my current favourite.


Wherever you are from, I want to THANK YOU so much for visiting my blog, and invite you to visit again soon.


This blog hop is open for members of the CTMH Blog Boosters. Please do not enter if you are not a member of the group. (But please feel free to look... and we all love comments!)

Monday, September 30, 2013

Chantilly Workshop on the Go

I love the Workshop on the Go kits! I've had a play with the Laughing Lola kit, and then last night I tried out the Chantilly. I was able to incorporate Heart 2 Heart Challenge's "Alphabet Soup" task by using my two sets of lettering.
I managed to get a few shots of Emma at dance class last week that are passable... this is a challenge when she's moving about in very changeable lighting! But still, being the doting parent that I am, I'm very happy with the finished page.

Sunday, September 29, 2013

Christmas Stamp Sets

I love Christmas. At the start of October I begin to think about my Christmas cards, and what I will make for my friends and family - yes, it may seem extremely early, but I often make my own stamped images, and this is something that takes a lot of time and organisation! Here are a couple of the stamps I've made in the past:

This year I really have no need to create my own stamps - I have found my perfect set, and it is called Glory to God. As you may have realised, I love the traditional nativity scene on a Christmas card... but there are many more Christmas stamp sets available in my online shop for you to browse. Prices range from $5 to $29. Head on over to my website to browse through these and other acrylic stamp sets.

 
Glory to God (set of 10) $29
 
Yuletide Greetings (set of 9) $29
 
Merry & Bright (set of 12) $23

Candyland (set of 8) $29
 
Santa's Greeting (set of 1) $5
 
Tree Delights (set of 1) $5
 
Christmas Village (set of 10) $29
 
Polar Bear Holiday (set of 8) $23